Graduation day is right around the corner, and you know what that means.
It’s time to toss the textbooks and start thinking about how you’re going to stand out in a sea of identical gowns.
Let’s be real, a plain black mortarboard is a little boring.
Upgrading your cap isn’t just about looking cute in photos; it’s about celebrating your unique journey and making it instantly recognizable to your family in the bleachers.
If you want to create a stunning keepsake without spending a fortune, you are in the right place.
In this post, you’ll discover 20 DIY graduation cap decor design ideas that range from elegant to hilarious.
You will get step-by-step breakdowns, clever crafting tips, and serious inspiration to make your cap the envy of the entire graduating class.
Let’s get crafty!
1. Floral Cascade
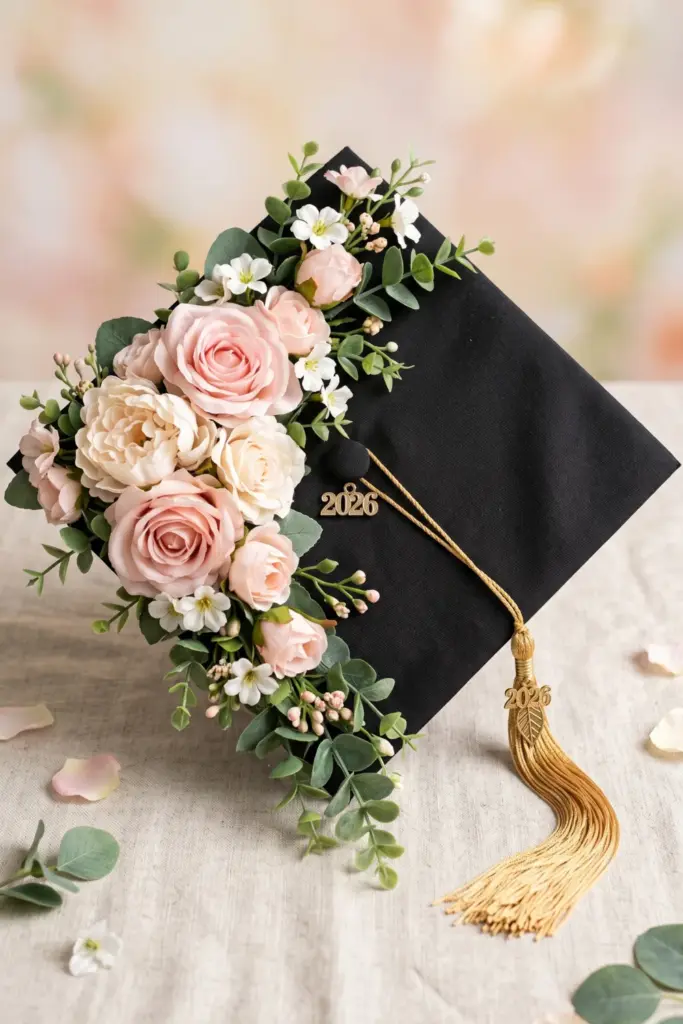
Silk flowers spilling from one corner
Bring a touch of spring to your big day!
This romantic design looks incredibly high-end but is shockingly easy to put together.
It creates a gorgeous 3D effect that photographs beautifully.
Steps to create this look:
- Trim the stems completely off your faux flowers.
- Arrange them loosely on the cap to test the layout before committing to glue.
- Use a hot glue gun to secure the largest flowers first in one corner.
- Fill the empty gaps with smaller blooms and leaves, letting them trail downwards.
Tip: Mix different textures of greenery to make the arrangement pop! Look for faux eucalyptus stems at your local craft store or online floral supply shops.
2. Glitter Ombré
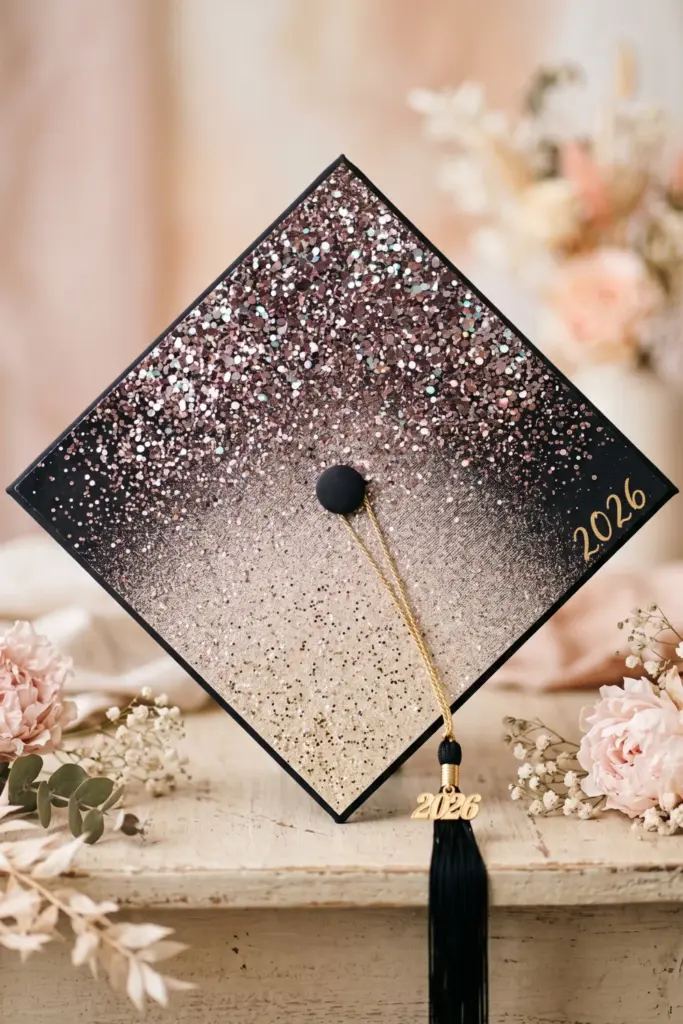
Fading sparkle from top to bottom
Who doesn’t love a bit of sparkle?
An ombré glitter effect is eye-catching and surprisingly therapeutic to make.
It catches the stadium lights perfectly as you walk across the stage.
Steps to create this look:
- Tape off the center button of your cap to keep it clean.
- Apply a thick layer of Mod Podge to the top edge.
- Sprinkle your darkest glitter heavily at the top.
- Gradually apply less glitter and mix with a lighter shade as you move down the cap.
- Seal the whole thing with a clear acrylic spray.
Tip: Do this outside! Glitter has a habit of migrating everywhere indoors. Check out online glitter retailers for chunky holographic mixes to get the best shine.
3. Inspirational Quote

Vinyl lettering with a motivational phrase
Sometimes, words speak louder than visuals.
Adding a powerful quote is a classic choice that never goes out of style.
It’s perfect for manifesting your next chapter.
Steps to create this look:
- Cut a piece of sturdy cardstock to fit your cap and punch a hole in the center.
- Use a craft cutting machine (like a Cricut) to cut your quote out of adhesive vinyl.
- Use transfer tape to apply the quote smoothly to the cardstock.
- Glue the finished cardstock securely to your cap.
Tip: Pick a bold, highly legible font so your family can actually read it from the stands!
4. Constellation Night Sky
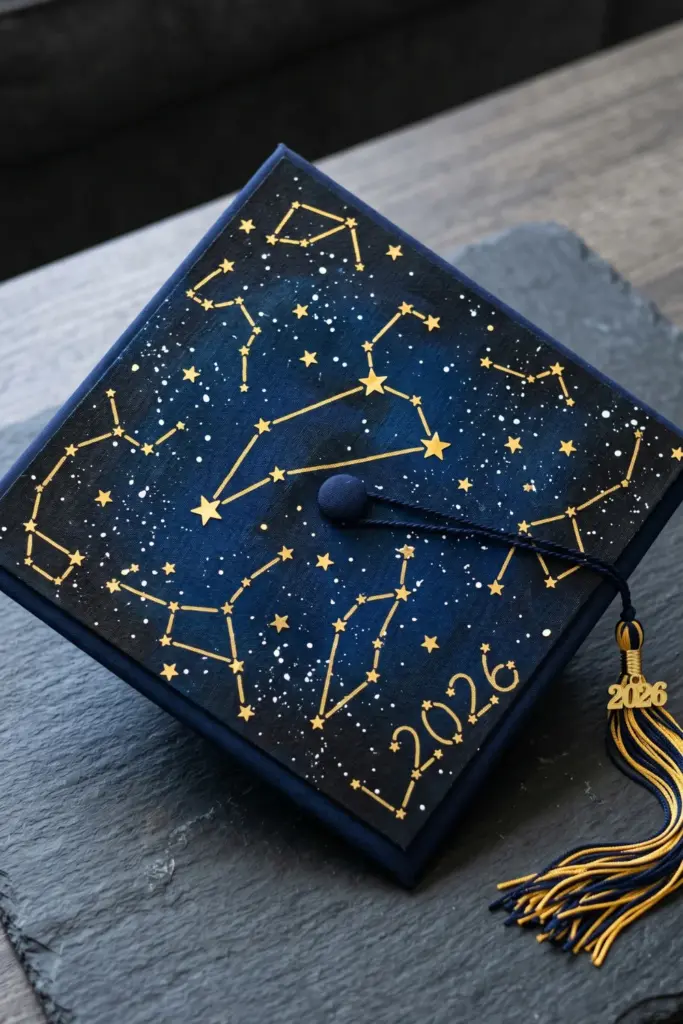
Gold stars and constellation lines
For the dreamers and the stargazers.
This celestial theme is moody, magical, and totally unique.
Plus, you can map out your actual zodiac sign for a personalized touch.
Steps to create this look:
- Paint a piece of poster board with blended navy blue and black acrylic paint.
- Splatter white paint using an old toothbrush to mimic distant stars.
- Use a gold metallic marker to draw constellation lines.
- Glue on tiny gold foil stars for added texture.
Tip: Find a free star map generator online to get the constellation shapes exactly right.
5. Marble Effect
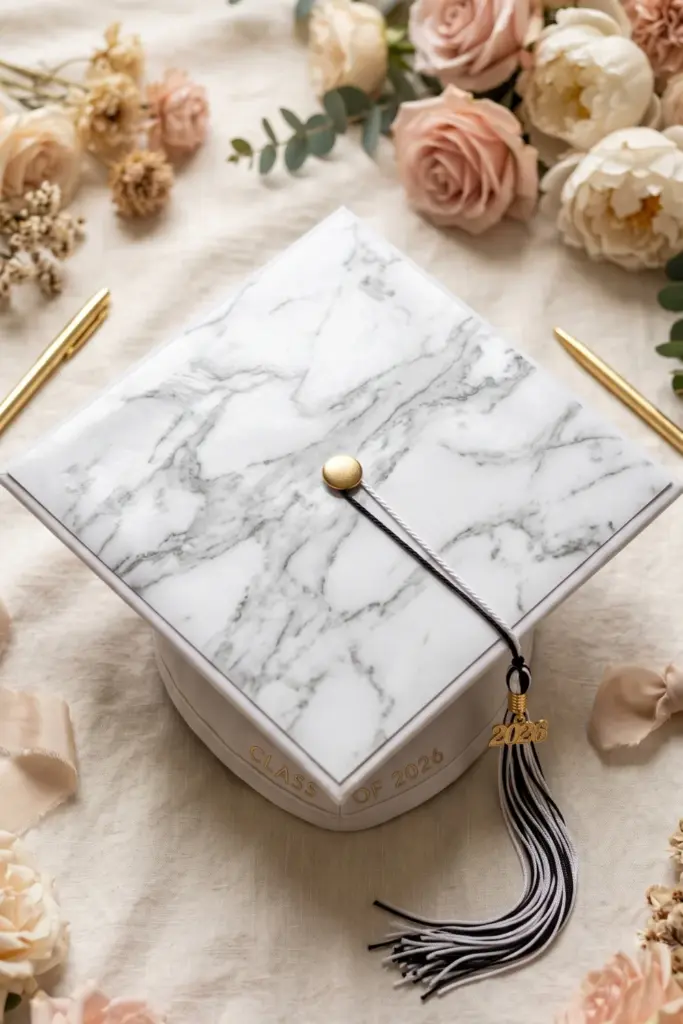
White and gray swirled contact paper
Sleek, modern, and practically foolproof.
If painting isn’t your jam, contact paper is about to be your best friend.
It gives a luxurious, heavy vibe for just a few pennies.
Steps to create this look:
- Unroll a sheet of marble-patterned adhesive contact paper.
- Trace your cap’s dimensions on the back, leaving a tiny overhang.
- Cut out the square and a small hole for the tassel button.
- Peel off the backing slowly, smoothing out bubbles with a credit card as you go.
Tip: Warm the edges slightly with a hairdryer to make the vinyl fold cleanly around the sides of the board.
6. Retro 70s Daisies
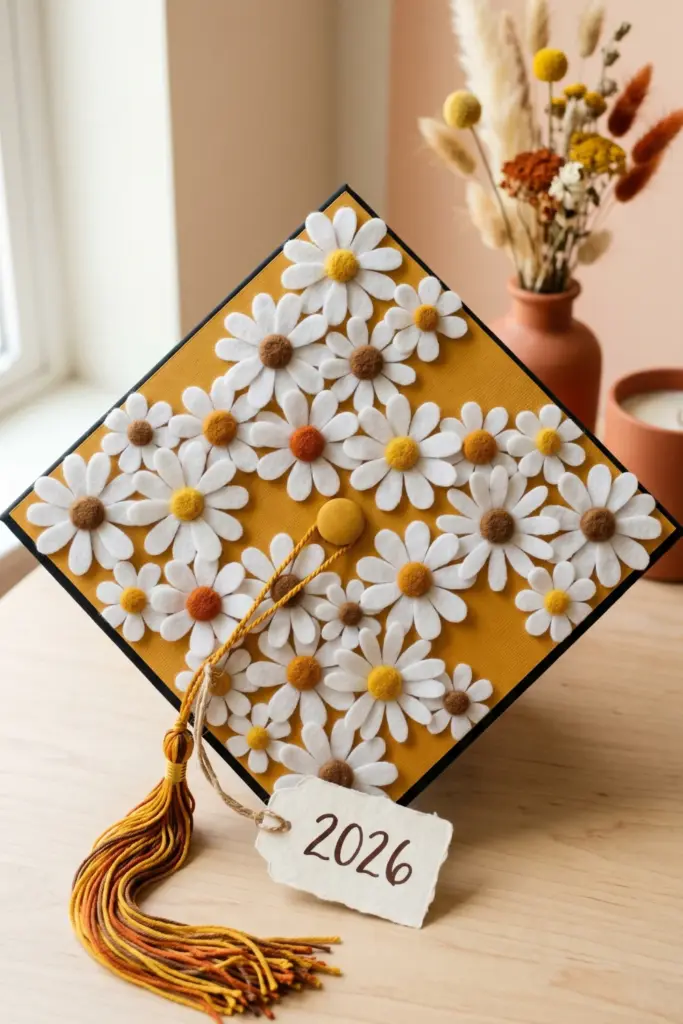
Bold orange and yellow daisy pattern
Bring on the groovy vibes!
Retro aesthetics are having a huge moment right now.
This bright, cheerful design will guarantee you stand out from the crowd.
Steps to create this look:
- Cover your base with mustard yellow or rust orange cardstock.
- Cut daisy petals out of white felt or heavy paper.
- Cut small brown or yellow circles for the flower centers.
- Glue the daisies in a scattered, overlapping pattern across the cap.
Tip: Layering felt instead of paper adds a really cool, vintage texture that looks amazing in close-up photos.
7. Neon Pastel Geometric
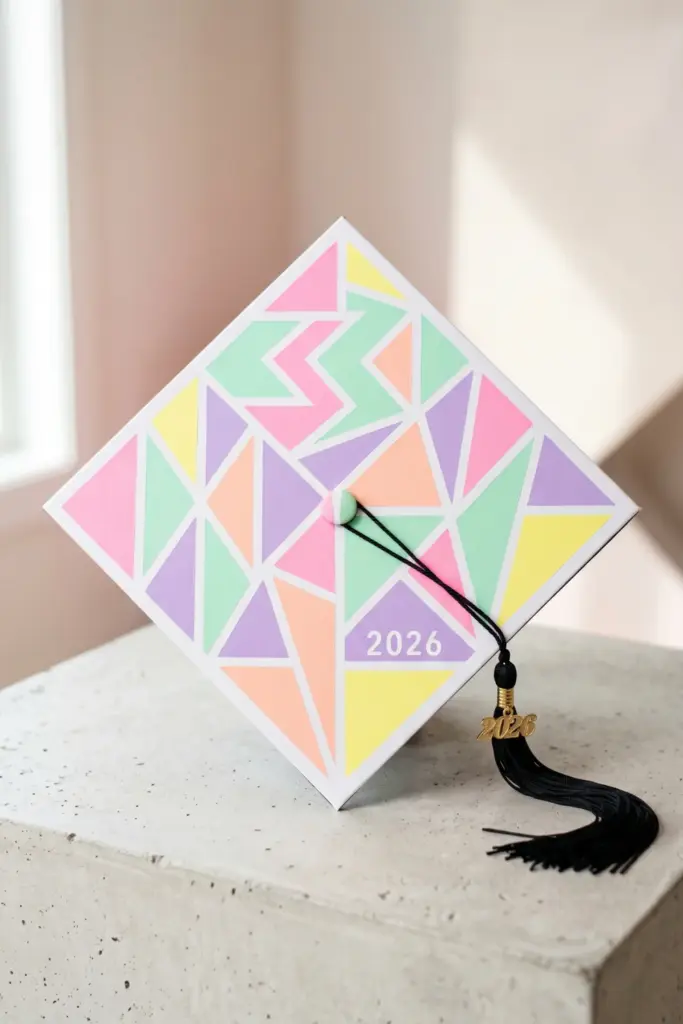
Triangles and zigzags in soft neon hues
Edgy but soft.
This design relies on crisp lines and a really fun color palette.
It’s basically modern art for your head.
Steps to create this look:
- Paint your cap or cardstock base solid white.
- Use painter’s tape to create intersecting geometric shapes.
- Paint each taped-off section a different pastel neon color.
- Carefully peel off the tape while the paint is still slightly wet to avoid chipping.
Tip: Make sure you press the tape down firmly so the paint doesn’t bleed underneath the edges!
8. Pearl & Monogram
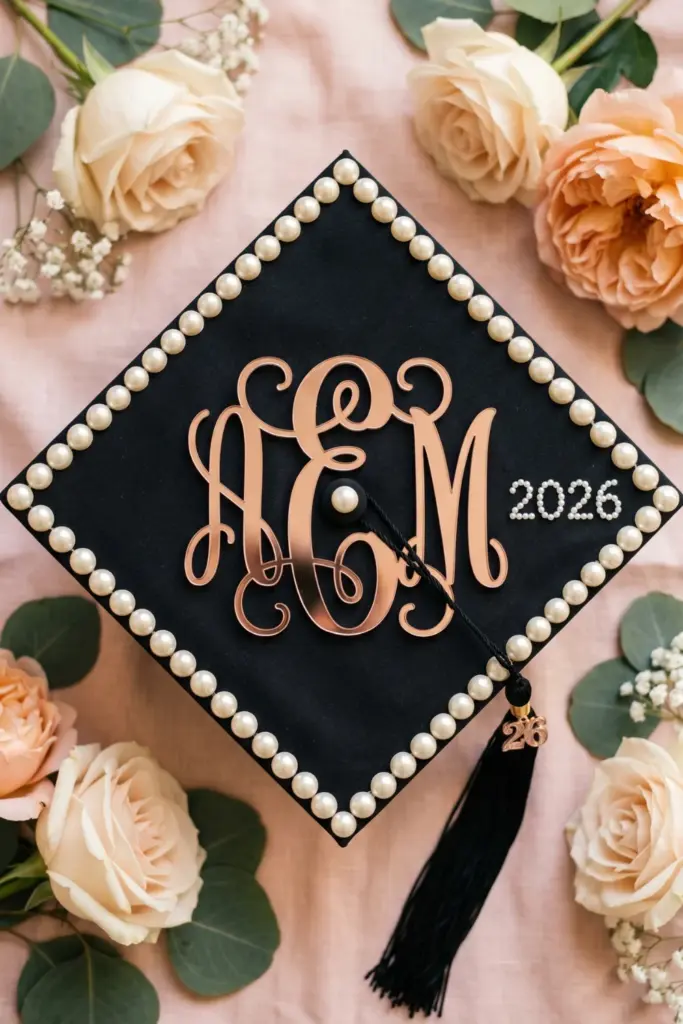
Pearl border with a large initial
Totally preppy and timeless.
This is for the graduate who loves a classic, polished aesthetic.
Pearls make everything look just a little more expensive.
Steps to create this look:
- Outline the edge of your cap with flat-backed adhesive pearls.
- Purchase a large wooden or acrylic letter for your monogram.
- Paint the letter to match your school colors or leave it sleekly metallic.
- Use heavy-duty glue to attach the monogram to the center of the cap.
Tip: Use craft tweezers to place the pearls perfectly straight along the border without getting glue on your fingers.
9. Leather & Gold Foil
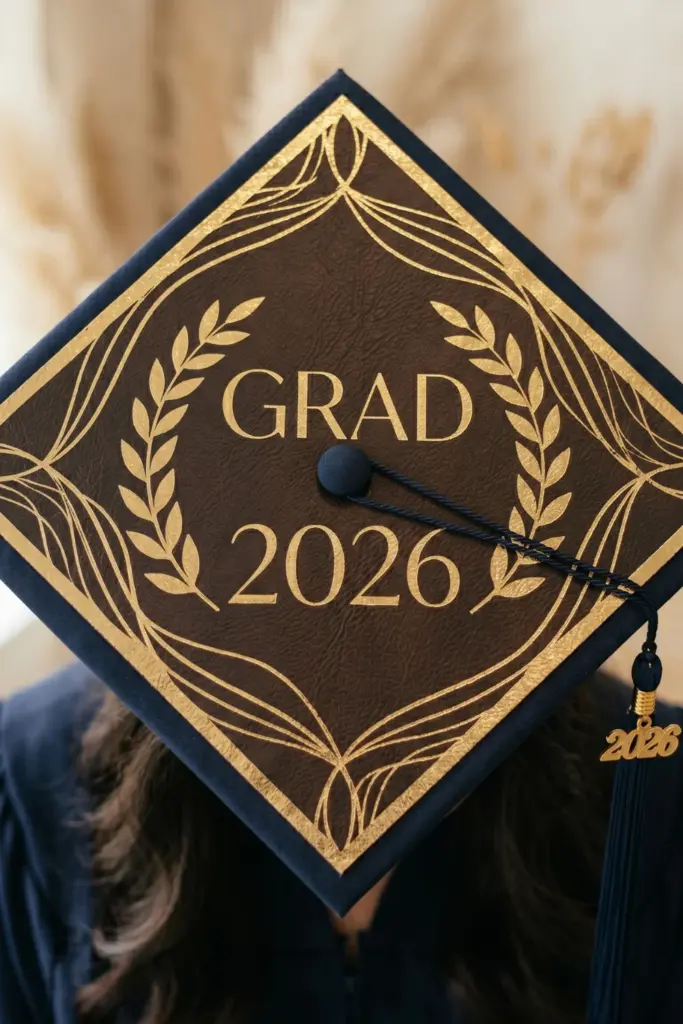
Faux leather center with gold foil accents
A little bit rustic, a little bit glam.
Faux leather gives a surprisingly sophisticated texture that pairs incredibly well with shiny gold accents.
Steps to create this look:
- Cut a square of faux leather to fit your cap perfectly.
- Apply foil adhesive size to the specific areas you want to highlight.
- Wait until the adhesive is tacky, then gently press on gold leaf sheets.
- Brush away the excess foil with a soft, dry paintbrush.
Tip: Seal the gold leaf with a spray sealer so it doesn’t flake off onto your gown during the ceremony!
10. Watercolor Abstract
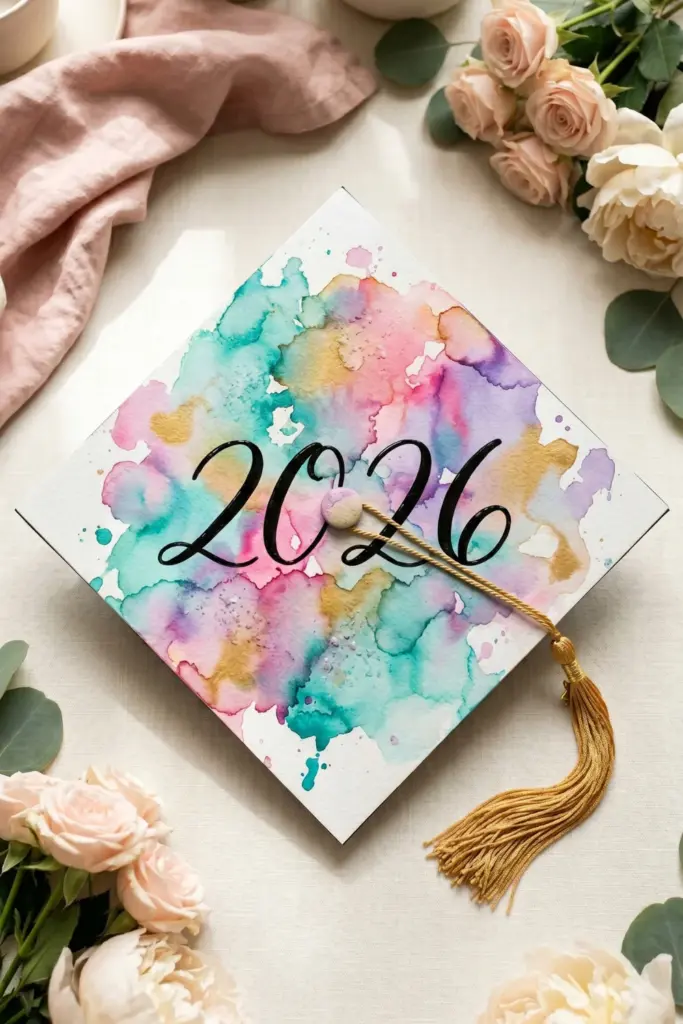
Splashes of teal, pink, and purple
Let your creativity flow.
Watercolor designs are beautifully fluid, meaning minor mistakes just look like happy little accidents.
No two caps will ever look alike!
Steps to create this look:
- Cover your cap with a thick sheet of watercolor paper.
- Wet the paper slightly with a clean brush.
- Drop in liquid watercolors (teal, pink, purple) and let them bleed together naturally.
- Once completely dry, write your grad year in cursive with a black paint pen.
Tip: Sprinkle a little table salt on the wet paint for a really cool, mottled texture effect!
11. Funny Meme
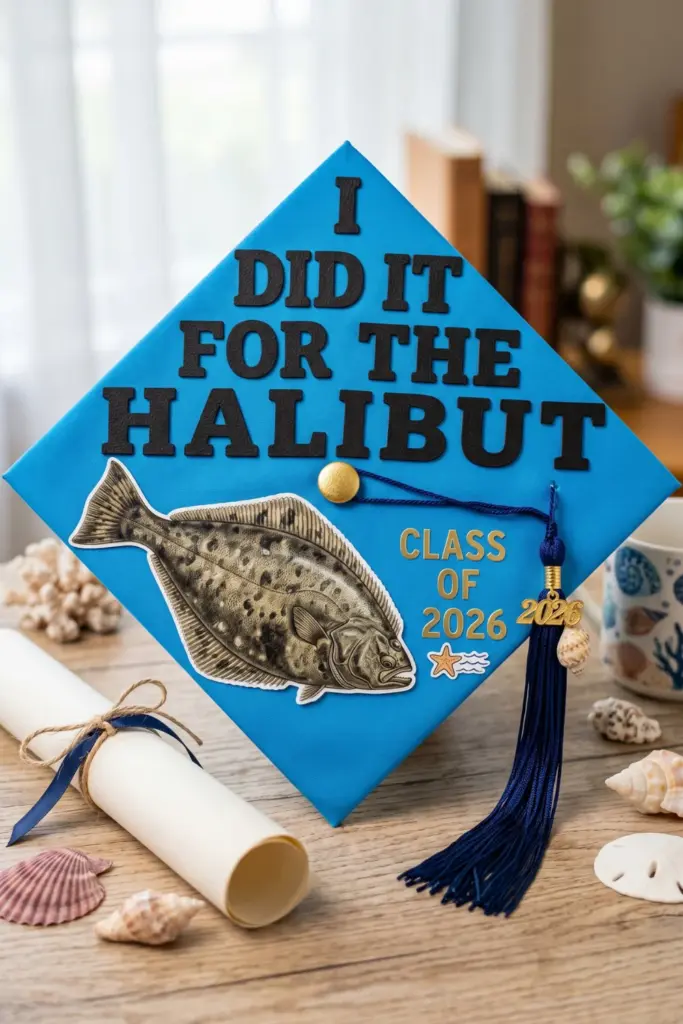
“I “Did It For The Halibut” (marine biology themed)
Bring some humor to a long ceremony.
Punny, degree-specific caps are always a crowd-pleaser and usually end up going viral on social media.
Steps to create this look:
- Pick a bright, solid background color to make the text pop.
- Print out a high-quality illustration of a fish (or your major’s equivalent).
- Glue the image securely to the cap.
- Add your funny pun using bold, block letter stickers.
Tip: Keep the text large and the joke simple so people can read and understand it quickly from a distance.
12. Holographic Iridescent
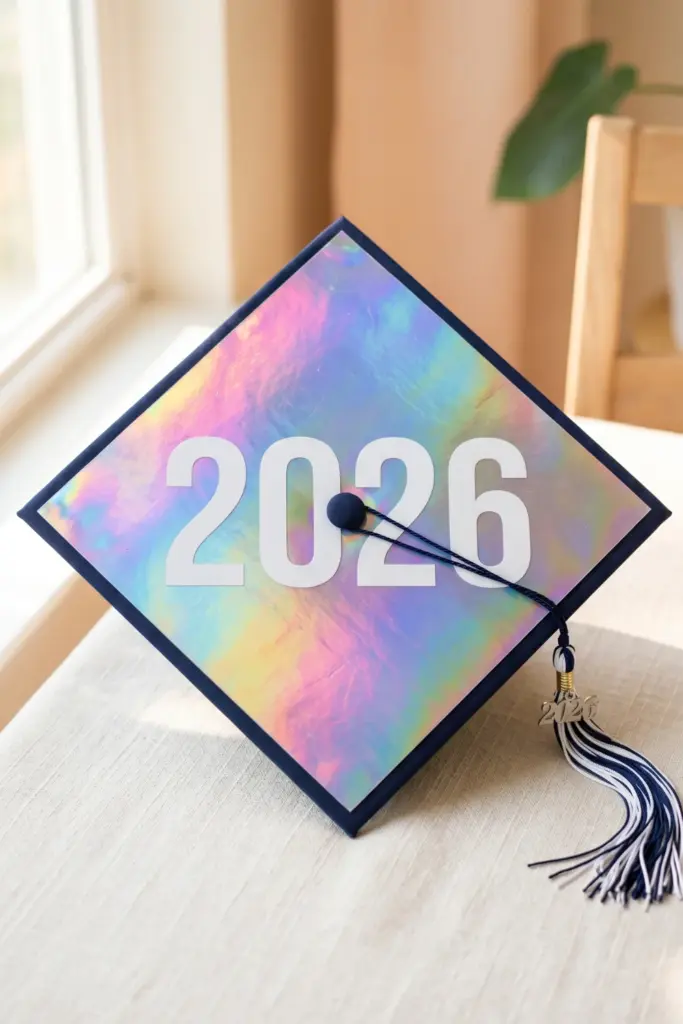
Holographic film that shifts colors
Catch every single ray of sunlight.
This futuristic vibe is incredibly mesmerizing.
It’s perfect for the grad who wants maximum impact with minimal effort.
Steps to create this look:
- Buy a sheet of adhesive holographic vinyl.
- Measure and cut the vinyl to fit the top of your cap.
- Slowly peel and stick, smoothing from the center outward to avoid bubbles.
- Trim any excess edges cleanly with an X-Acto knife.
Tip: Add a simple white vinyl decal over the top so it pops boldly against the shifting colors.
13. Destination Map

Map of the city you’re moving to
Moving away for a new job or grad school?
Show off your next adventure!
This is a super meaningful way to celebrate where you’re headed.
Steps to create this look:
- Find a vintage or colorful map of your destination city online and print it.
- Cut it to the exact size of your mortarboard.
- Mod Podge the map onto the cap to seal it.
- Place a heart sticker or enamel pin over the specific city or neighborhood.
Tip: Trace your travel route from your college town to your new city with a dashed marker line for a cute road-trip vibe.
14. Rhinestone Year
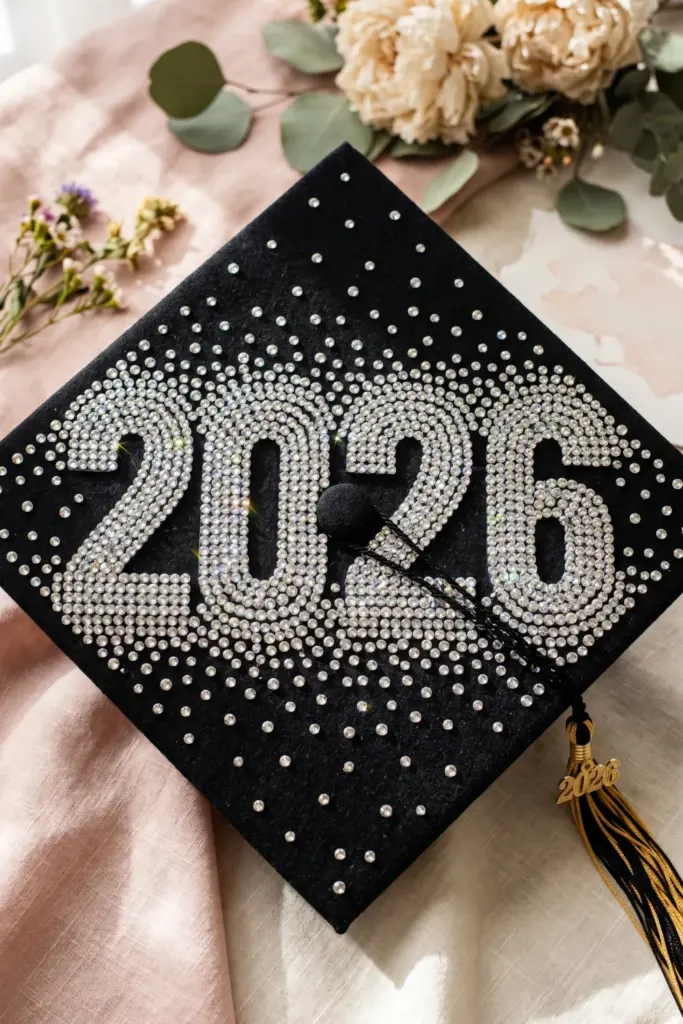
Sparkling “2026” or graduation year
Glamour, glitz, and graduation!
Sometimes you just need to bedazzle something.
It’s loud, proud, and celebrates the exact moment you achieved your goal.
Steps to create this look:
- Print out your graduation year in a large, block font to use as a stencil.
- Trace the numbers onto your cap using tailor’s chalk.
- Apply small dots of industrial-strength gem glue along the lines.
- Use a wax pencil tool to pick up and place flat-back rhinestones onto the glue.
Tip: Buy glass rhinestones instead of plastic acrylic ones for maximum sparkle under the lights.
15. Polaroid Photo Collage
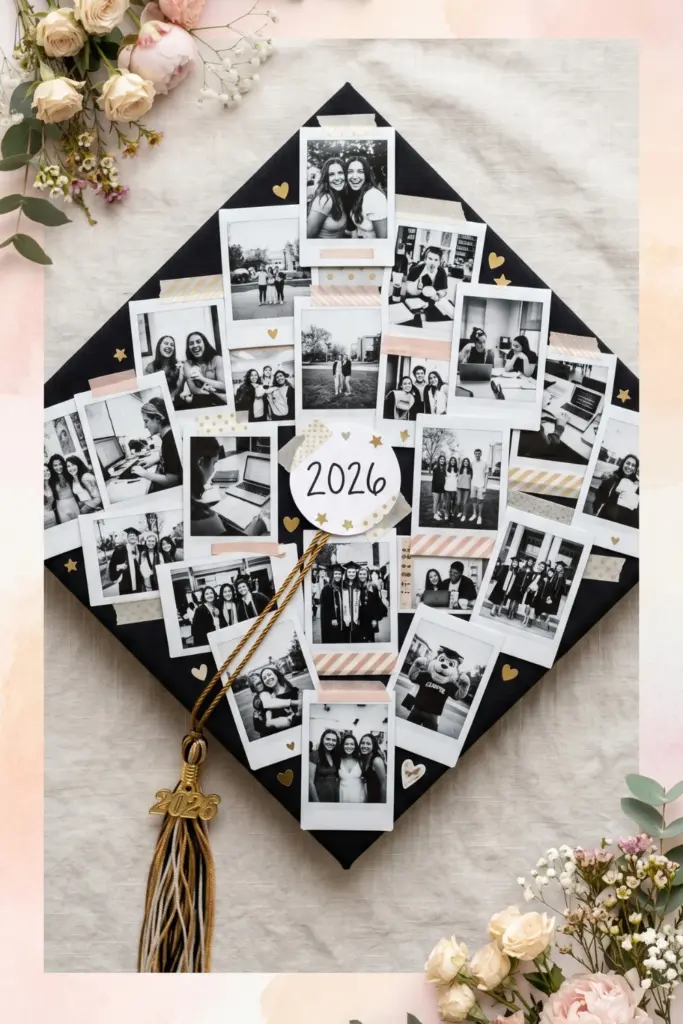
Tiny printed photos from college years
Take a trip down memory lane.
Why pick one memory when you can feature them all?
This cap becomes a literal scrapbook of your favorite moments.
Steps to create this look:
- Print tiny versions of your favorite photos (wallet size or mini Polaroid style).
- Arrange them in a messy, overlapping grid on the cap.
- Use double-sided tape to stick them down flat.
- Fill in the blank spaces with cute washi tape or tiny stickers.
Tip: Print the photos in black and white for a cohesive, artistic look that won’t clash with your gown.
16. Tie-Dye Vibrant
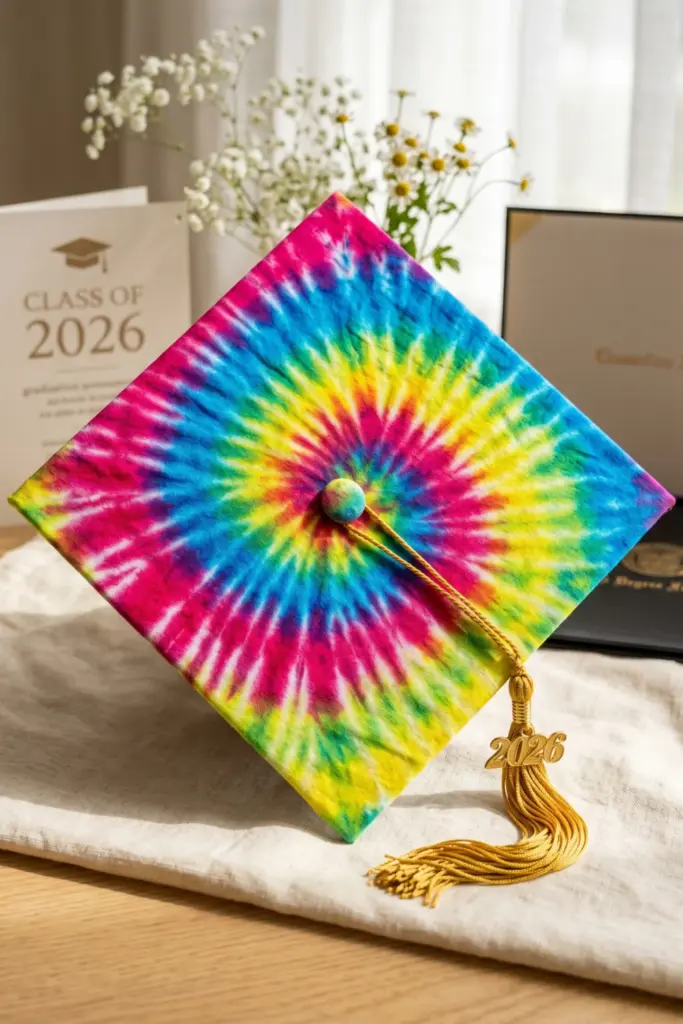
Bright spiral tie-dye pattern
Perfect for a spring or summer grad.
Tie-dye is just pure joy in fabric form.
It’s colorful, chaotic, and completely unique to your creative process.
Steps to create this look:
- Buy a white cotton fabric square that is slightly larger than your cap.
- Pinch the center and twist it into a flat, tight spiral.
- Secure with rubber bands and apply bright fabric dyes to the wedges.
- Once washed and dried, stretch it over your cap and glue the edges underneath.
Tip: Make sure to let the dye set for the full recommended time (usually 24 hours) for the brightest, longest-lasting colors!
17. Chalkboard Doodles
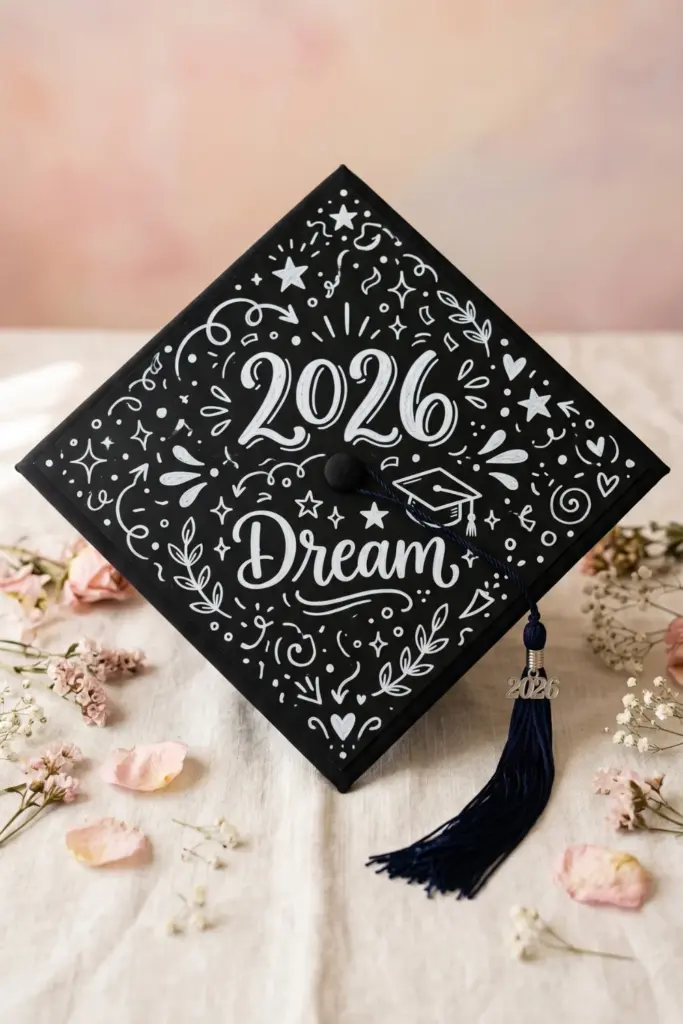
Black surface with white chalk-like drawings
Change your mind a lot?
The chalkboard cap is brilliant because it’s temporary!
You can literally change your design the morning of graduation if inspiration strikes.
Steps to create this look:
- Cut a square of adhesive chalkboard vinyl.
- Stick it smoothly onto the top of your cap.
- Season the board by rubbing a piece of standard chalk all over it and erasing it.
- Draw your final design using fine-tip chalk markers.
Tip: Chalk markers are much more vibrant and smudge-proof than regular dusty chalk, so definitely invest in a pack.
18. Lace Elegance
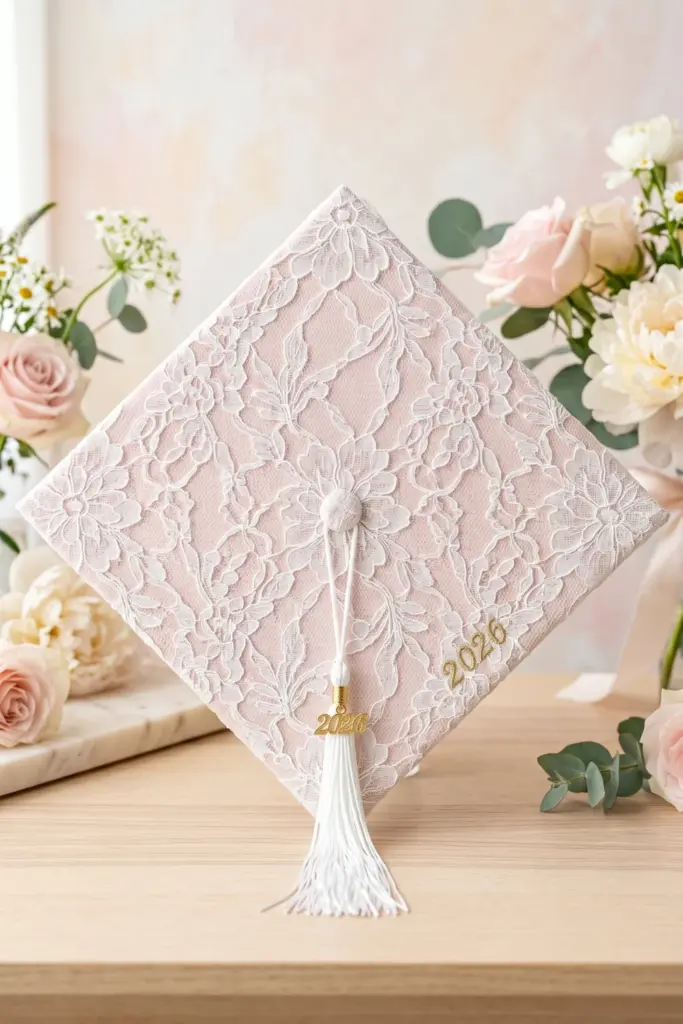
White lace overlay on a pastel background
Soft, feminine, and subtly beautiful.
Lace adds a gorgeous dimension without being overwhelming.
It looks particularly amazing paired with a floral graduation dress.
Steps to create this look:
- Paint your cap or use a pastel cardstock base (like blush or mint green).
- Cut a square of delicate floral lace fabric.
- Stretch the lace tightly over the cap so the pattern sits flat.
- Use hot glue on the underside of the edges to secure it in place.
Tip: Spray adhesive is a great way to tack the center of the lace down so it doesn’t bubble up around the tassel.
19. Comic Book Pop Art
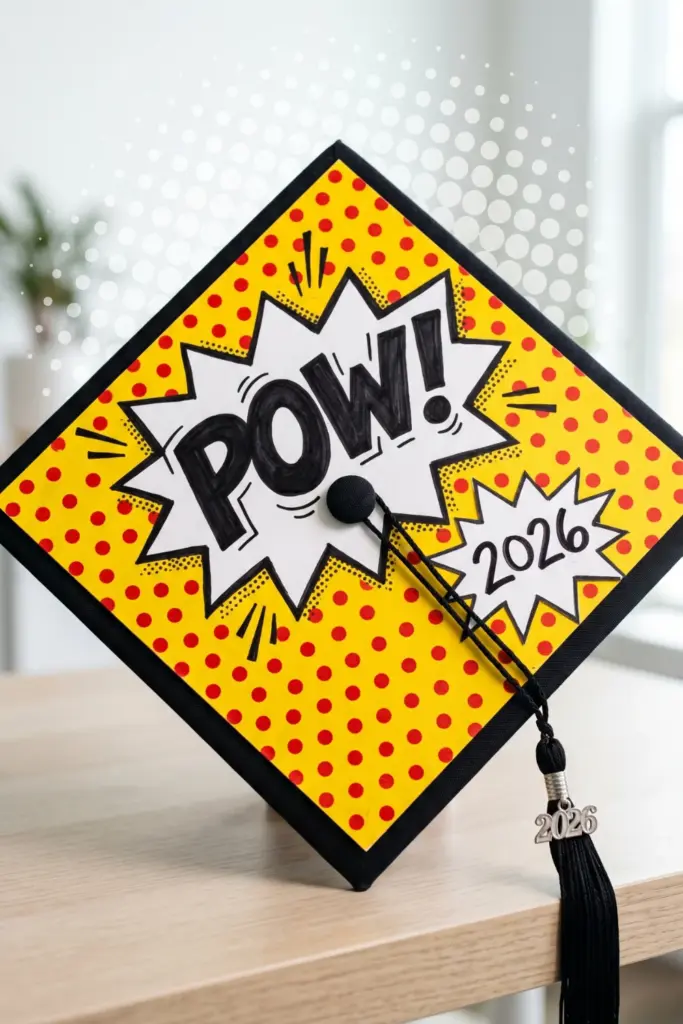
Ben-Day dots and action words like “POW!”
Channel your inner superhero!
Graduating is a massive feat, so why not celebrate with a dramatic, comic book-style burst of color?
Steps to create this look:
- Create a background using bright yellow paper covered in uniform red polka dots.
- Cut out a jagged comic “explosion” bubble from white paper.
- Outline the bubble heavily in thick black marker.
- Write a phrase like “HIRED!” or “POW!” in block letters inside.
Tip: Look up “Roy Lichtenstein art” online for great inspiration on the classic pop-art aesthetic.
20. Minimalist Boho
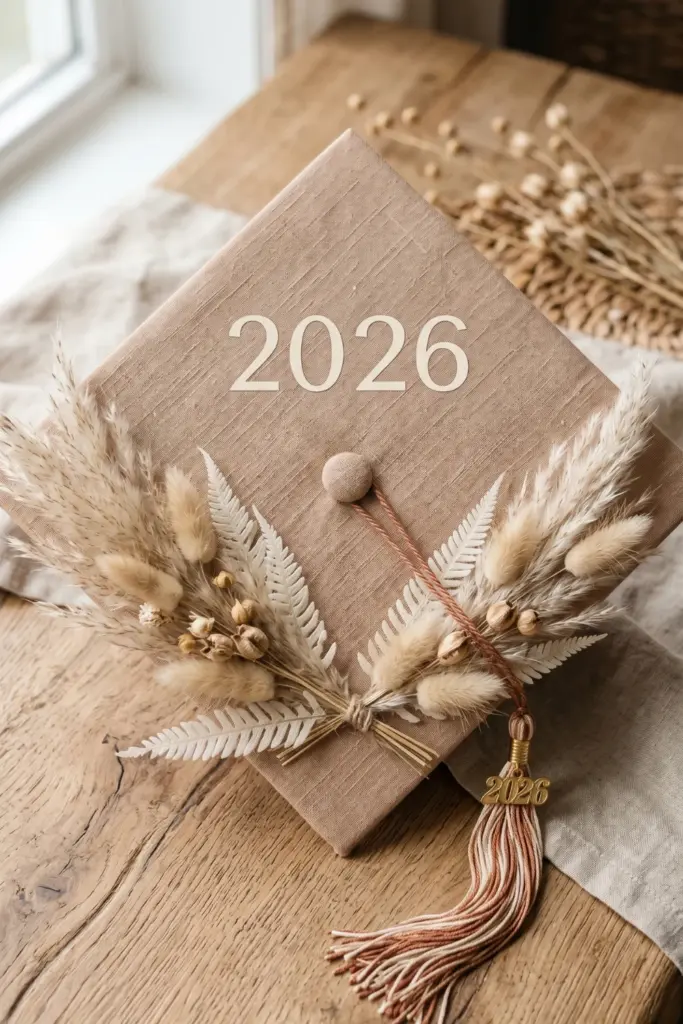
Pampas grass and neutral earth tones
Keep it chic and grounded.
If bright colors aren’t for you, this earthy, textured aesthetic is incredibly popular right now.
It feels very mature and grounded.
Steps to create this look:
- Cover the cap in a beige or terracotta linen fabric.
- Glue a small, sweeping bundle of dried pampas grass to the bottom curve.
- Add a few dried bunny tails or bleached ferns for texture.
- Write your name or grad year in a simple, minimalist font.
Tip: Spray the pampas grass lightly with hairspray before attaching it so it doesn’t shed all over your shoulders!
Final Thoughts
Graduating is a massive milestone, and your cap should totally reflect the hard work, late-night study sessions, and joy it took to get there!
Whether you go for a hilarious pun that makes the crowd laugh or a chic pearl border that matches your style, the most important thing is that it feels authentic to you.
Remember to give yourself plenty of time to gather supplies, and don’t stress if it’s not absolutely flawless—those little imperfections just add character and charm.
If you decide to use heavy materials, double-check your glue strength so nothing falls off mid-ceremony.
Now grab that hot glue gun, put on your favorite playlist, and get to work. Congratulations, grad! You did it!